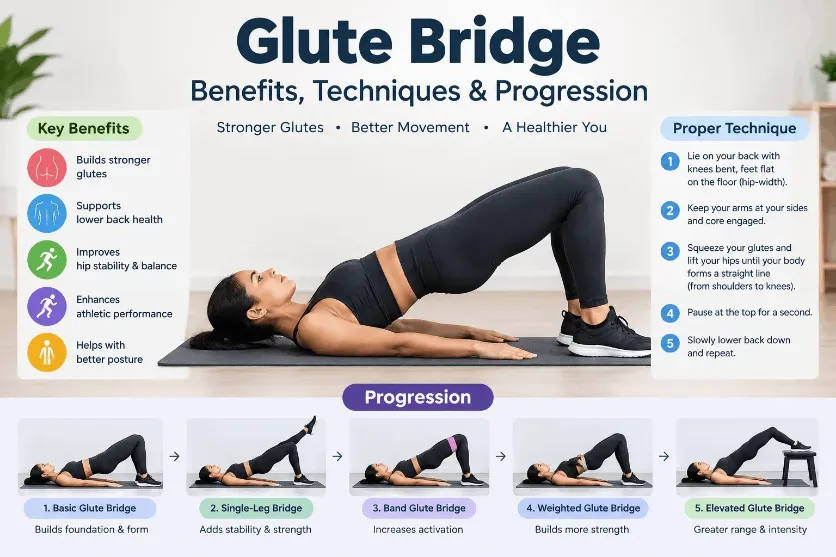
Glute Bridge: Benefits, Techniques & Progression
What Is the Glute Bridge Exercise?
The glute bridge is a simple exercise that strengthens the gluteal muscles, hamstrings, and core while supporting better hip stability and posture.
The muscles that keep you upright and moving, the gluteus maximus and the rest of the posterior chain, are strengthened when you drive through your feet and lift your hips.
For nearly everyone, including women over 40 who want to increase strength, older individuals who want to improve their balance, and weekend warriors who want more stable hips, it is a dependable place to start because you only need to use your body weight.
It’s an easy movement. The goal is to load the gluteus maximus directly, often known as the glutes, at the position where it is strongest and best isolated.
And that’s precisely where the complex part begins.
When the hip is fully shortened, the gluteus maximus generates the greatest force. In comparison to the other muscles capable of performing hip extension, it is where the muscle is strongest. Only the upper portion of the action involves the glute bridge.
And that’s a benefit if you want to train your glutes as precisely and directly as you can. Similar to using a leg extension machine to train your quadriceps alone.
The core musculature provides stability, while the hamstrings and the massive inner thigh muscle adductor magnus play a secondary role. Compared to hip thrust, the quadriceps are barely used because there isn’t the same mechanical justification for pushing the back upward and backward against a bench, which means the quadriceps aren’t under as much strain.
Muscles Worked by the Glute Bridge
Your primary hip extensor, the gluteus maximus, is strengthened primarily by the glute bridge.
As part of your posterior chain, your core and back muscles support your pelvis and spine, while your hamstrings the biceps femoris, semitendinosus, and semimembranosus help along the back of your thighs.
The glute bridge is one of the finest exercises for strengthening the lower glutes and enhancing hip extension, the movement that propels standing, walking, and climbing stairs, according to the orthopedic specialists at the Hospital for Special Surgery.
Glute Bridge Video
Technique: How to do a glute bridge correctly
Setup:
Place your shoulders on the ground while lying on your back. The feet are flat on the floor, hip-width apart, and neither too near nor too far from the buttocks; the knees are bent. As a general guideline, the heels should be about a hand’s width apart from the buttocks. If the distance is too great, the hamstrings take over; if it is too near, the knee locks at an uncomfortable position.
Actively check the position at the top: the knee should be over the ankle and the shin should be nearly vertical when the hips are fully extended. The feet are too near if the shin tilts back. They are too far away if it leans more forward.
When useful, a floor-based barbell is positioned low over the hips, near the groin. To ease soreness, use a cloth or a barbell pad. Before you start, find a neutral pelvic position.
The setup for the glute drive machine is easier: position yourself on the backrest so that your buttocks are as close to the edge as possible without protruding over it. If the belt is uncomfortable, place it over the bottom of the pelvis and use a hip thrust pad.
Execution:
The hips, not the spine, are where the movement begins. To achieve complete hip extension at the peak, actively push your hips upward. There is no forward tilting or arching of the lower back; the pelvis stays neutral.
For a few moments, maintain the top position. This is where the workout yields the greatest results and where the gluteus maximus is strongest. Controllably lower the hips back down, but only to the point where the knees start to approach the body. For the duration of the exercise, the shin should stay at roughly the same angle. You will lose the concentrated work at the top and shift toward a hip-thrust variety as you descend further.
Look up toward the ceiling or forward while keeping your neck neutral or slightly flexed. Both are right. If you have trouble arching your lower back and tipping your pelvis forward, a small amount of neck flexion can help.
Tempo and control:
Speed is not as crucial as control. Instead of launching the hips with a jerk from the bottom, lower slowly and squeeze harder and harder on the way up. This guarantees that the glutes perform the task.
The weight is too heavy if you are unable to maintain a neutral pelvis when in the top position. Start with less than you believe is necessary.
Most Common Mistakes
Rather than fully extending the hips, the lower back arches at the peak.The most frequent mistake that results in the greatest harm. Many tip the top of the pelvis and the stomach forward to compensate when the weight is too heavy for complete hip extension with a neutral pelvis. It’s not a complete hip extension. It deprives you of the exact portion of the exercise that best develops your glutes. Lose the weight.
The distance between the feet is excessive. The hamstrings do more of the work when the feet are too far from the buttocks. At the uppermost position, the shin should be nearly vertical; actively check it.
You perform a new activity after descending too far. The character of the movement changes as the hips are lowered to the point where the knees start to approach the body; you’re getting close to a hip thrust variation and lose the concentrated effort at the top. It’s okay to have some momentum, but the goal is to raise the hips rather than launch the weight from the bottom. Throughout the entire exercise, maintain the shin at roughly the same angle.
Too quick of a tempo with no control at the top. It is definitely possible to perform glute bridge explosively. However, control is more crucial if the objective is to efficiently exercise the glutes. The weight rises with momentum from a quick jerk from the bottom, but the glutes are not working as hard as they should.
The core is inactive, and the ribs flare. You lose the neutral position in your spine when your stomach falls, and your ribs rise. Before starting the exercise, keep your ribs slightly down and softly brace your stomach.
Too little weight without increasing strain. The glute bridge appears straightforward, and it’s tempting to maintain a comfortable weight. To achieve results, however, the exercise should be loaded gradually. Compared to 100 repetitions with body weight, three sets of 6–8 repetitions with a weight that truly pushes you yield much superior results.
Benefits of Glute Bridges for Strength and Stability
1. Develops the Gluteal Muscles: Strengthening the gluteus maximus, medius, and minimus collectively is one of the advantages of glute bridges. Frequent practice of this exercise strengthens the glutes, which is beneficial for daily tasks like walking, climbing stairs, and standing for extended periods of time.
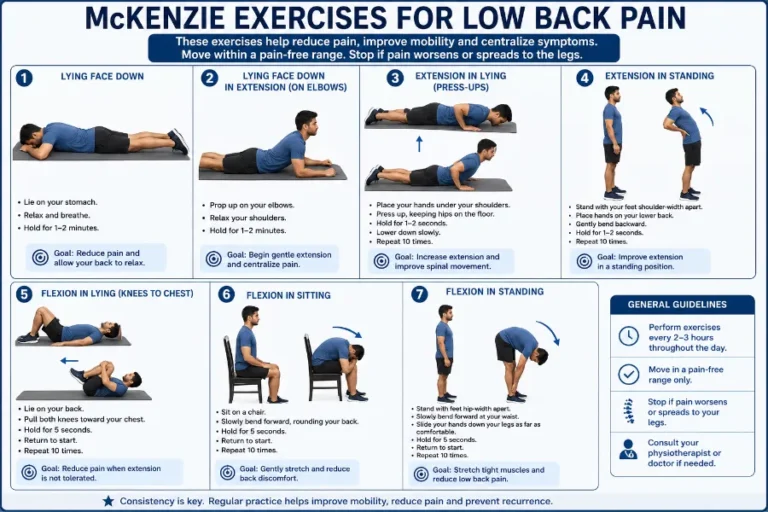
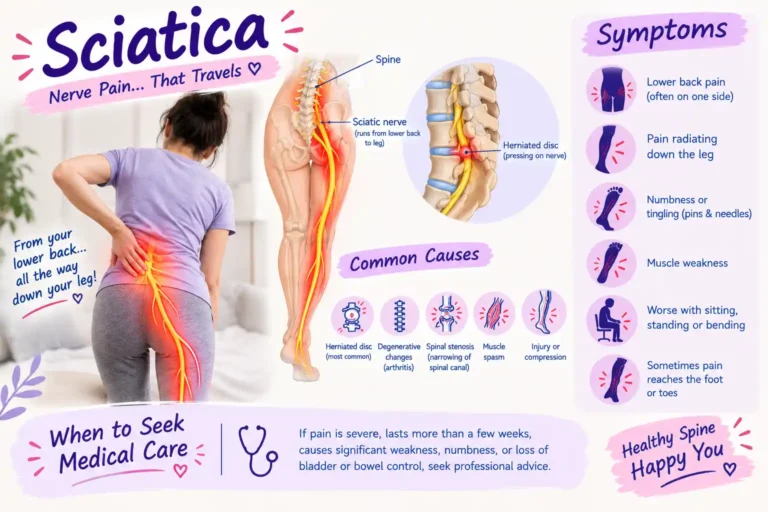
2. Diminishes Pain in the Lower Back: Tension and exhaustion are frequently the result of the lower back overcompensating due to weak glutes. By using bridges to strengthen the glutes, one can relieve the strain on the lumbar spine and, with regular practice, reduce lower back pain. If you have diagnosed back pain, you should always see a doctor.
3. Enhances Hip Stability: The muscles surrounding the hip joint are trained by the hip extension motion in a glute bridge. Over time, this lowers the risk of imbalance-related injuries by improving stability during walking, running, and lateral motions.
4. Activates and Strengthens the Core: Maintaining the bridge position calls on the transverse abdominis and other core muscles to remain active. Because of this, glute bridges are more than just a lower-body workout; they are a functional core exercise.
5. Encourages Improved Posture: Sitting for extended periods of time tightens the hip flexors and deactivates the glutes. By reactivating latent glute muscles and reestablishing the muscular balance that maintains proper alignment of your spine and pelvis, glute bridges combat this pattern.
6. Improves Sports Performance: More power for running, jumping, and sport-specific motions is strongly correlated with stronger glutes. Glute bridges are a fundamental exercise used by both athletes and leisure fitness enthusiasts to increase speed and explosive output.
7. Benefits of a Single Leg Glute Bridge: The single-leg glute bridge isolates one side at a time. Once you have mastered the normal version, this is an excellent progression since it corrects left-right strength imbalances, challenges each glute independently, and requires much more core control.
8. Enhances Knee Alignment: Inadequate knee tracking during movement is a result of glute weakness. Increasing hip and glute strength with bridges promotes improved alignment during squats, lunges, and walking and stabilizes the knee joint.
9. Encourages Pelvic Floor Function: Glute bridges are particularly helpful for postpartum recuperation and developing deeper pelvic stability since they cooperate with the pelvic floor muscles. Learn more about the advantages of Kegel exercises and how they work in conjunction with glute bridge training.
10. Easy to Learn and Equipment-Free: No weights, no gym, no issue. Glute bridges are low impact, requiring only a level surface, and may be performed by people of almost any fitness level. They can be done as part of an organized home session, first thing in the morning, or during a work break.
Variations and Progressions
Body weight off the ground. If you train at home or lack access to equipment, this is a fantastic place to start. Learn the motion, feel the glutes moving, and achieve complete hip extension with a neutral pelvis. When you are unable to increase the weight, add a 2-second pause at the top to make it more difficult. It’s time to find load when you can effortlessly perform 15+ repetitions with a pause.
Barbell glute bridge. Use a towel or barbell pad to lift the barbell low over the hips. An excellent option if you don’t have access to a glute drive machine. As the weight increases, many people eventually discover that they slide over the floor; enough friction beneath the shoulders and upper back helps, but it can become a constraint.
B stance glute bridge. One foot bears the majority of the weight while the other is mostly employed for balance, creating a compromise between bilateral and single-leg. Focuses more on a single leg at a time without requiring the same level of balance as single-leg.
Glute bridge with just one leg. With one leg outstretched, the entire weight is supported by the other. puts more pressure on equilibrium and can be used to identify and correct imbalances. It’s a particular decision with a specific goal, not an advancement from bilateral.
It’s easy to progress: just add a little more weight or one more repetition while maintaining the same effective technique. That’s all that matters. Train within a set range, such as 6 to 8 repetitions, using twofold progression. The next time, you raise the weight once you can perform eight with proper form.
How to Add Glute Bridges to Your Routine
Gaining strength after 40? As part of a lower body regimen, incorporate a few controlled bridges a few days a week. Mobility focused? It works great to move gently and deliberately a little each day. A weekend warrior or a runner?
Before working out, activate your glutes with bridges, then go on to single-leg and banded exercises.
To complete a posterior-chain regimen, combine the bridge with exercises like the clamshell and look through our free exercise library.
FAQs
What are the benefits of the glute bridge?
A straightforward bodyweight exercise that strengthens your lower body, strengthens your joints, and enhances your posture is the glute bridge.
Do glute bridges actually grow glutes?
When you train near muscle failure and employ progressive loading, glute bridges do indeed help you strengthen your glutes.
Is the glute bridge better than squats?
Squats focus the quadriceps and increase overall lower-body strength, while glute bridges isolate the glutes with less joint stress. Neither exercise is “better” in general.
How long should you hold a glute bridge?
When performing regular repetitions, you should hold a glute bridge for one to two seconds; when performing an isometric endurance hold, you should hold it for ten to sixty seconds.
References:
- Glute Bridge: Technique, benefits and variations. (n.d.). https://www.nordicperformancetraining.com/blog/glute-bridge
- Bothra, T. (2026a, September 19). 10 Benefits of glute bridges. Habuild. https://habuild.in/habitology/strength-and-fitness/benefit-of-glute-bridges
- Sporty Doctor. (2026, September 8). Glute bridge exercise: How to do it, benefits & form tips. Sporty Doctor – Sports Medicine Advice for Weekend Warriors. https://sportydoctor.com/exercises/glute-bridge/